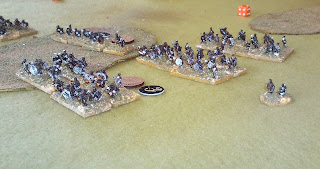
The British had 2 brigades, each of 3 infantry units, plus a single light gun. The Zulus had 3 brigades of 3 warband units and a brigade of 2 warbands and 2 skirmishers (Head, Chest and 2 Horns!).
The first game was a outright Zulu victory. The right Horn rush forward and caught everyone by surprise, including the Zulu commander! The British failed their first attempt to form into a line and only succeeded after the Zulu charge fell just short and failed to make contact. (3 moves instead of 2 would probably have ended the game there and then). The British 1st brigade frantically fought the Horn off, but were effectively pinned in place for the rest of the battle.
As the left Horn closed in, the 2nd brigade deployed into line, but due to lack of space, crammed up against the baggage train, only one of then was able to fire at the incoming Zulus. The 1st unit was forced back in disorder and the Zulus crashed into the second rank. To try and make room to deploy the 3rd unit the CinC ordered the baggage forward, where they were pounced upon by a unit of skirmishers, who quickly destroyed the first stand (an unfortunate group of mules). The lead unit of the Head now came up and took out the other two baggage stands in quick succession. As that had been rather a quick game, we fought on, with the British making some astounding Break Tests (one shaken unit lost 3 consecutive routs of melee and still passed every time).
With one brigade broken on each side and the Zulu Chest moving around to get behind the surviving British, we decided it was time for lunch!
After a pleasant lunch and a beer (Wye Valley Brewery's Butty Bach), we swapped sides and played it again.
This time the Zulus came on at a similar pace, with the Horns slightly advanced from the Head and Chest. The British 2nd Brigade quickly deployed into a firing line, but the 1st brigade repeat their performance from the morning and took three turns to deploy and get into position.
The Zulus tried to close with the redcoats, but this time the British firing from the 2nd brigade threw then back and quickly reduced the left Horn to a single unit. 1 broken brigade for the Zulus! The Head moved across to engage the 2nd brigade as the right Horn crashed into the 1st brigade. The Zulu Head overran the gun, but were thrown back by the British firing once again. As the Zulu attack paused, one of the British units moved across to enfilade the Zulu impis. Pretty soon the |Head was also broken without even contacting the British line.
On the other flank the right Horn routed one of the British units in a hard fought melee then pushed the others backwards. Ina bloody round of fighting they broke the British 1st brigade, but became broken themselves from their losses in the same combat. With 3 Zulu brigades broken now it was a British Victory.
For some reason I completely forgot to take pictures of the first game but here is some of the action from the second one.
The 2nd Brigade deploy
But the 1st Brigade dithers!
The Zulu Head advances
As does the Right Horn.
And the Chest.
The British firing line.
Halts the advance in it's tracks.
What's left of the Left Horn!
The final situation.


Really nice and I can see you both had a great day!
ReplyDeleteThanks Noel, yes we had great fun!
DeleteNice sized actions and nice to see the BP rules bringing out some pressures for the British to deal with.
ReplyDeleteIt makes a change to be playing BP with smaller armies, but we find it's still a good game.
DeleteVery nice indeed it's one of my favourite periods
ReplyDeletehttp://www.10mm-wargaming.com/
Take care
Andy
Thanks Andy.
ReplyDeleteYou are more than welcome
Delete